Jigsaw: A Static Site Generator With All The Pieces
Phil Young • June 26, 2020
Setting The Scene
A couple of years ago, when I first went to set up a site for myself I went through a couple of different iterations of ways to build one. First, there was a Vue SPA:
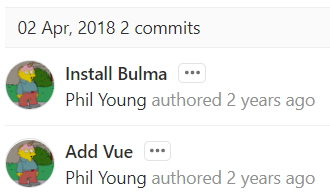
I then decided that this was too much work for the free time I had, so I decided on a+ Laravel site that was database and an API driven Vue frontend, before deciding the same again and going for a Laravel database-only setup:
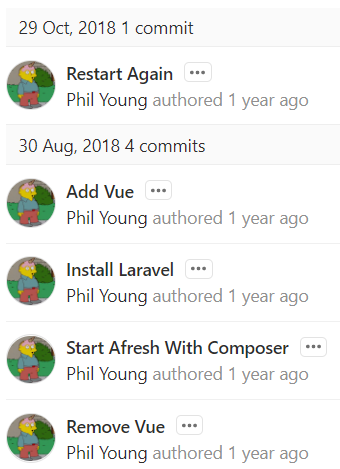
But yet again, I was thwarted by free time and the grand idea of having database driven content. This then got "put on the backburner" while I concentrated on other things, but during the COVID-19 lockdown in the UK this year I suddenly got more time on my hands, allowing me to clear my formerly evergrowing backburner and get around to writing this site.
When I looked down my commit history, I spotted how many restarts I'd had, so I decided to KISS this and learn from The Unicorn Project and not go for an all singing, all dancing site that I might not even need and start off with a static site generator.
What Is Jigsaw?
Jigsaw is a static site generator built by Tighten Co (the company behind Jigsaw with Laravel supremo Matt Staufer as the technical director). Jigsaw is built in PHP and based around some pretty cool Laravel functionality like collections and blade templates , which I find super easy to use with it's developer-friendly API. Jigsaw also uses Markdown to render content, making it super easy to create and edit.
Why Jigsaw?
Initially I looked into Hugo , Pelican and Jekyll , as I've either used them in work before or had a play around with them in my spare time. It was after thinking about these I thought back to some training I'd been to.
Working at UKFast , training is actively encouraged. In the RnD department which I work in, we aim to have at least 2 training talks a month. Being mostly ran by the PHP team, you would think that this would be very PHP heavy, but it's probably a 50/50 with PHP vs non-PHP talks.
This particular training session I remembered was run by @bibby_ryan in February this year on Jigsaw and how I thought it looked like such a cool tool, so I did a quick Google (which confirmed how I remember coming out of that training) and decided that I'd give it a spin.
Getting My Hands Dirty - Building This Site
Checking All The Pieces Are There: Pre-requisites
To develop with Jigsaw, we'll need PHP (minimum version 7.2.5) and Composer installed. As we'll be using Laravel Mix to compile the CSS and JavaScript, we'll also need Node.js and NPM installed.
The First Piece Of The Puzzle: Installation
If you head over to the jigsaw documentation , there's a very simple 1, 2, 3 setup process - Create, Install & Intialize with the 5 commands below:
$ mkdir my-site
$ cd my-site
$ compose init
$ composer require tightenco/jigsaw
$ ./vendor/bin/jigsaw init
This makes a directory, changes into it, creates a composer project, adds Jigsaw and scaffolds the base directory structure. Now we're ready to go!
Simple, huh?
Copy The Picture On The Box: Starter Templates
Once we've installed Jigsaw, you have a blank canvas. If this is a bit too daunting, there's a growing collection of starter templates. Tighten Co handily provide two official templates; the blog template and the docs template . Both of these come with some pretty amazing front end libraries:
- Tailwind CSS : A utility-first, highly customisable CSS framework which is gaining huge popularity at the moment
- PurgeCSS : A handy NPM tool which removes unused CSS selectors, trimming the fat off your CSS files
- Highlight.js : Sleek syntax highlighting of nearly 200 different languages
I chose the blog template, which also comes with:
- Vue.js : My favourite JavaScript framework, especially popular with Laravel developers
- Fuse.js : A lightweight & powerful fuzzy-search JavaScript library
If these don't float your boat, there is also a growing list of third-party templates over on Packagist .
As in the installation stage, installing the template you've chosen is a cinch:
$ ./vendor/bin/jigsaw init blog
Viewing Your Handywork: Compiling & Serving
Now that we've got the PHP side sorted, we need to compile our assets. To do this, we now look to npm to install the JavaScript dependencies we'll use to compile the site:
$ npm install
Jigsaw comes with a few pre-made compilation NPM commands to build the site. When a site is built, it adds it to a build_*
directory, with the suffix usually being your build command. For developing, my preference is the npm run watch command.
This will not only compile our assets and serve the site locally, but it uses Browsersync
to automatically refresh the browser window we're using to view the site when you make changes to the content and will also launch a browser window with the locally served copy of the site.
Putting In The Final Pieces: Configuration
Main configuration is done via a key => value PHP array inside config.php (in the same way Laravel does), although this
can be overridden for different environments, for example, it comes bundled with a config.production.php to override
configuration for production.
<?php

return [
    'production'  => false,
    'baseUrl'     => '',
    'title'       => 'Jigsaw',
    'description' => 'Website description.',
    'collections' => [],
];
As maybe expected, this can hold site-wide variables, which can be handily accessed as a part of the $page variable in
your blade templates. However, the config file is not just a standard key => value store, there are two more things that
can be defined here,
helper methods
and
collections
.
Explaining these, however, is being saved for a future article as I had to change none of these to get my MVP, so watch
this space!
Contact For Missing Pieces: Linking Up The Contact Form
The Jigsaw blog template comes with a contact form, but this form has no action. Static sites are just that, there's no server-side processing as it serves static HTML. One limitation of this is there's no form processing, so I looked to a third party as a stopgap before making my own, as I wanted to do this fast.
Tighten Co also make
FieldGoal
,
a FEaaS (Form Endpoints as a Service) product. Unfortunately, they do not have a free tier, so I looked around for
alternatives and came up with
Formspark
,
a similar service. Once I'd signed up, and followed the instructions to create a form, all I needed to do was copy the
generated URL into the action attribute on the <form> element and I was away!
Two security features I liked on Formspark were the Honeypot and reCaptcha intergrations, so I opted into them.
The honeypot installation was easy, all I had to do was add this hidden form field:
<input
    type="checkbox"
    name="_honeypot"
    style="display:none"
    tabindex="-1"
    autocomplete="off"
  />
The reCaptcha was a bit trickier. As there's no server side validation, the recommended easiest way to do this is with HTML5 form validation, which will work in pretty much every modern browser. As Formspark only support reCaptcha v2 at the time of writing, I followed the Google documentation only to realise the HTML5 validation stopped working. Bummer! After some googling, I came across a stack overflow post that explained how to do this. The only caveat was that it used jQuery, so I converted that into vanilla JavaScript.
We now need to copy the hidden input field below into the contact form:
<div class="g-recaptcha"
             data-sitekey="{{ recaptcha_key }}"
             data-size="invisible"
             data-callback="formSubmit"
             data-badge="bottomleft"
        ></div>
Next we need to put the code below at the bottom of the file. This pushes the JavaScript to the bottom of the page so it
doesn't block the page from loading, loads in the reCatcha library and adds an event listener to the form's submit action
(which will run after the HTML validation). This listener will execute the reCaptcha check if the form hasn't been submitted,
which then uses the callback formSubmit to finish the form submission and call the handler again, but as we've set the
data-recaptchaDone data attribute on the form to true it returns early and actually submits the form.
@push('scripts')
    <script src="https://www.google.com/recaptcha/api.js"></script>
    <script>
        document.getElementById("contact-form").addEventListener("submit", function (event) {
            let form = event.target

            if (form.dataset.recaptchaDone) {
                return
            }

            event.preventDefault()
            grecaptcha.reset()
            grecaptcha.execute()
        });

        function formSubmit(response) {
            document.getElementById("contact-form").dataset.recaptchaDone = true
            document.getElementById("submit").click()
        }
    </script>
@endpush
Seeing The Finished Article: Final Thoughts
Jigsaw was an absolute breeze to get my static site up and running!
I can't fault the ease of getting my site setup. I may be biased as I love Laravel and Vue and I'm quite familiar with them, but I found it super easy to use & I can see this being a super extensible base for a static site which fits my use case wonderfully!
Hats off to the team behind Jigsaw, you've done a great job, keep up the good work!